
Configure the Setting Timer
In the Setting timer section, there are 3 time types. Each of them has its own functionality. In order not to get confused when setting it up, please review this document to better understand the work and usage of each time type.
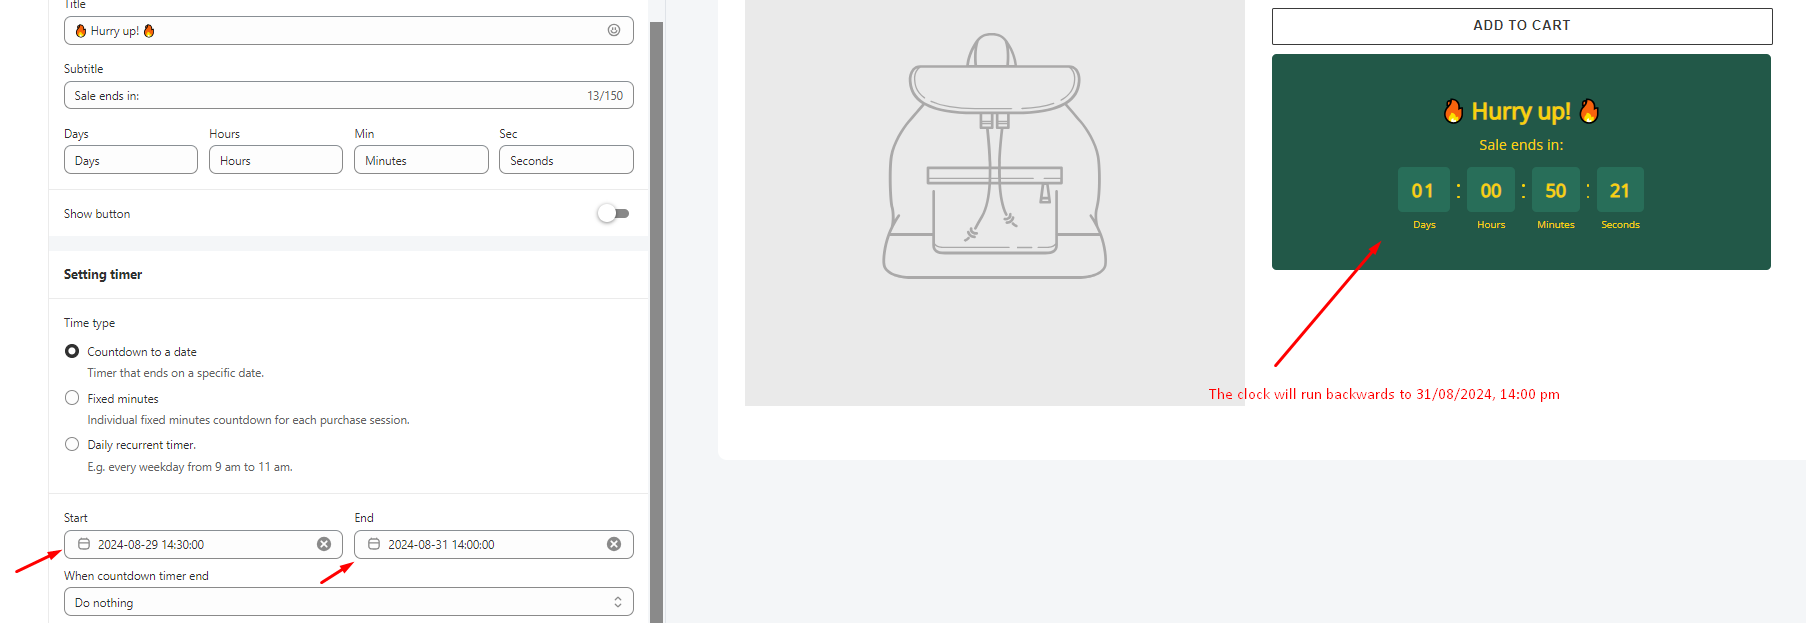
1. Countdown to a date
This setting is used to configure the countdown time until a date.
For example, the sale occasion starts at 14:30 PM on 29/08/2024 and ends at 14:00 PM on 31/08/2024. The time will be set up as follows:
2. Fixed minutes
If you only want to kick up a flash sale to your store, this time type can be the best solution as you can create a countdown time by minutes for each purchase session.
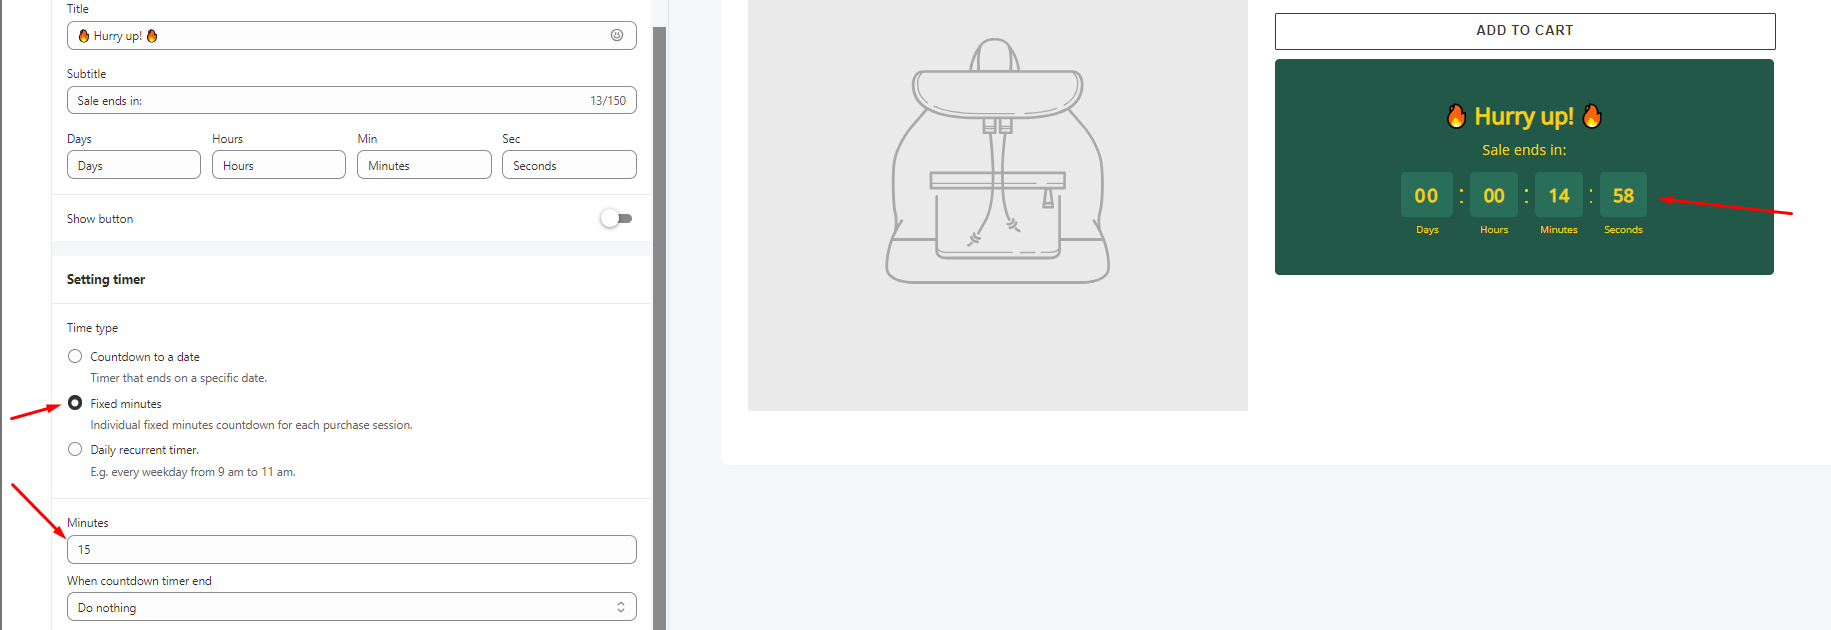
Depending on the amount of time you set up in the Minute field, the clock will run backward due to it.
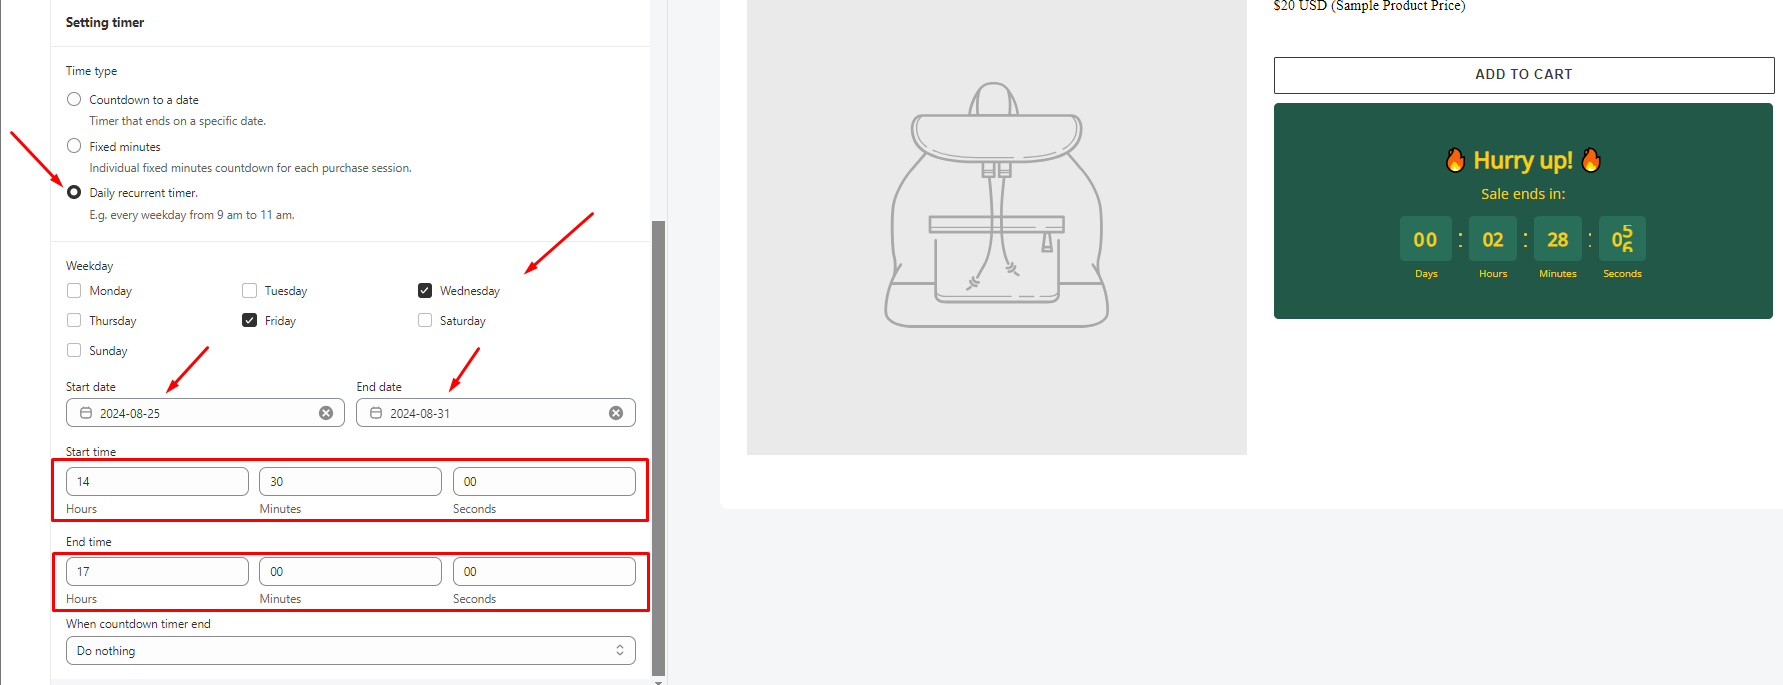
3. Daily recurring timer
If you have a sale event that happens on a specific day/some specific days in a week and the sale only appears for a certain amount of time in the day, this time type can help you do that.
Depending on your wish, you can set up the sale program on any day of the week, at a specific time. In this case, we will set up an example to easier understand.
“There is a sale event that happens every Wednesday and Friday of the week, it starts from 25/08/2024 to 31/08/2024, at 14:30 PM to 17:00 PM”
The timer will be set up as follows:
*Note: Our app uses the standard timezone for this time setting and displays the time due to the local timezone of your browser. Moreover, if you set up a time that is earlier than the current time, the clock will not start counting down until the time comes.
Select the timer’s action after ending the countdown:
– Do nothing: The countdown timer will stay the same on the page
– Hide countdown block: The countdown timer will disappear after the time ends.