Create and customize the Registration Form
Step 1: Add a new form
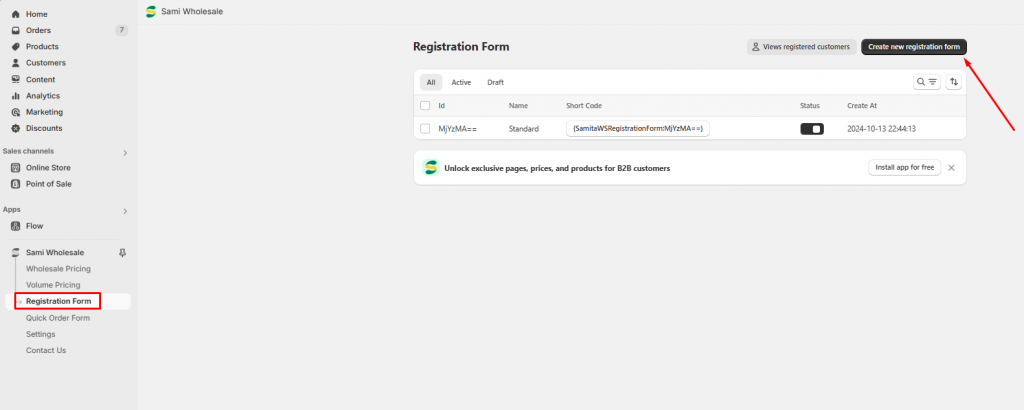
1. From the App admin page, click Registration Form
2. Click on the Create new registration form button > Select available template the app provides you
Steps 2: Start building a new form
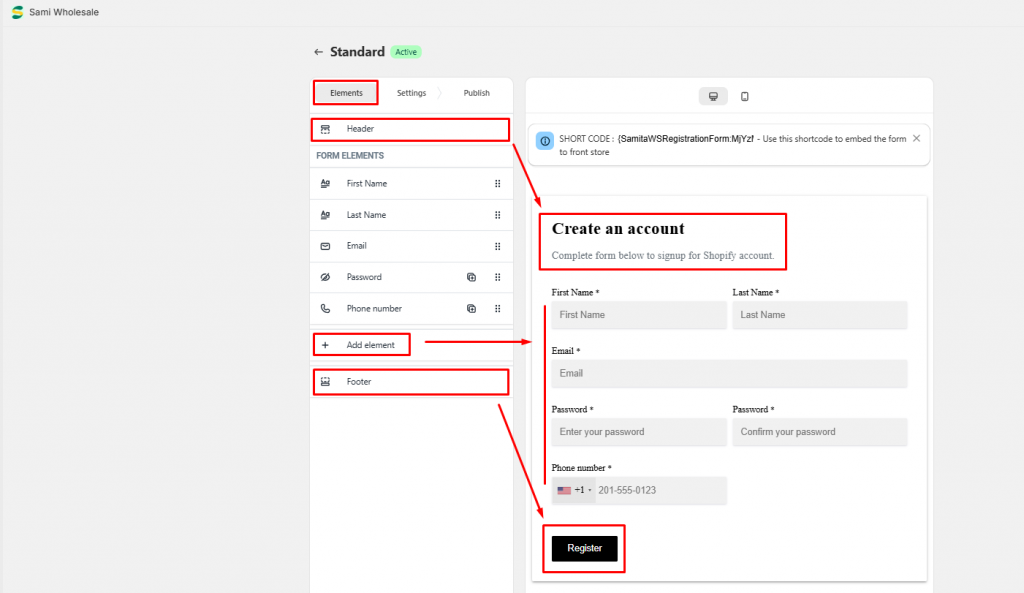
There are 3 tabs for you to set up the form: Elements, Settings, and Publish
- Elements: This tab is used to set up Header, Body and Footer for the form.
You can set up more fields for the form in this setting, too:
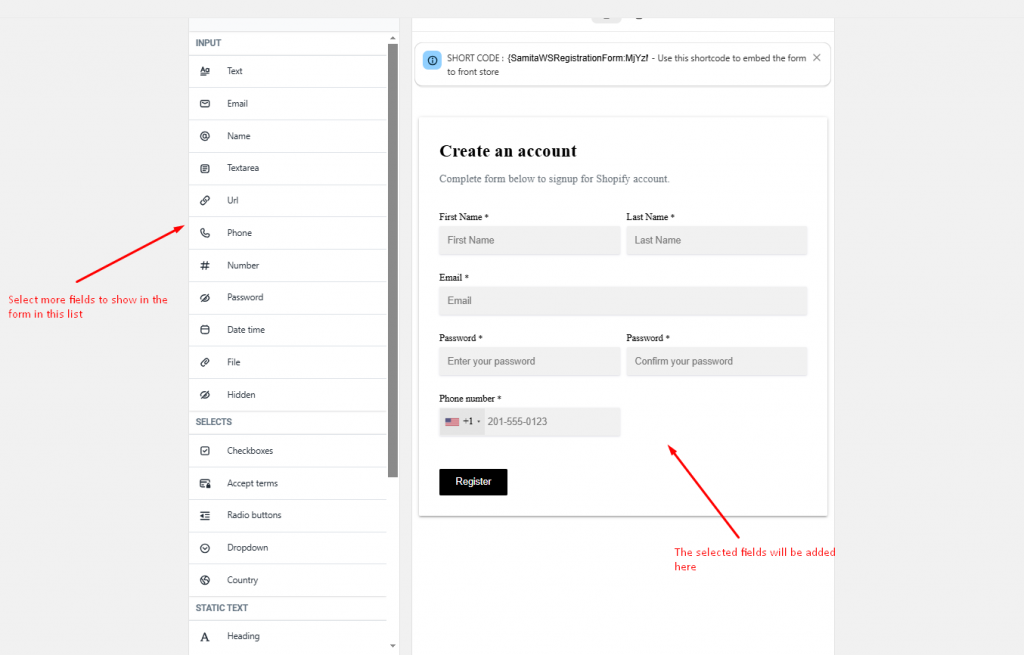
Steps to add more fields to form
- To add more elements, click on the Add elements button in section 1. The list of available elements will appear > Select the element that you want to add to the new form
- Click on the element, available properties setting for the element will be displayed
(Note: Available properties setting will correspond to a type of element)
Some general settings for elements as below:
(1) Label name
(2) Placeholder
(3) Description
(4) Limit characters
(5) Hide label
(6) Required
7) Select icon
(8) Column width
- Finally, click the Save button to update the form
Step 3: Link the Registration Form to Shopify
The purpose of this form is used to create a sign-up form for your customers, who want to become wholesalers. In order to make it works and the customer’s data can appear in the Shopify Customers folder, you have to integrate the form to Shopify. Please read this document to know how to link the form to Shopify.
Once you do this step, the customers will receive an account activation email from Shopify after you approve receive and approve their registrations.
However, the Registration form doesn’t replace the Shopify default login so the customers who have registered to this form will still need to log in to your store again to complete the step and become the wholesale customers. The registration form works along with Shopify login page, in case your store doesn’t have the Login page, this form is meaningless.
Step 4: Publish the Registration form in the front store.
To show the form in your front store, you need to use the app shortcode to manage this step. Please follow this guideline to know how to do it.
Tutorial video
Need support?
If you do encounter any difficulty while proceeding these steps, don’t show any hesitation to contact us promptly via the email address support@samita.io


