
Select products to show bagdes or labels
Select products to show badges or labels
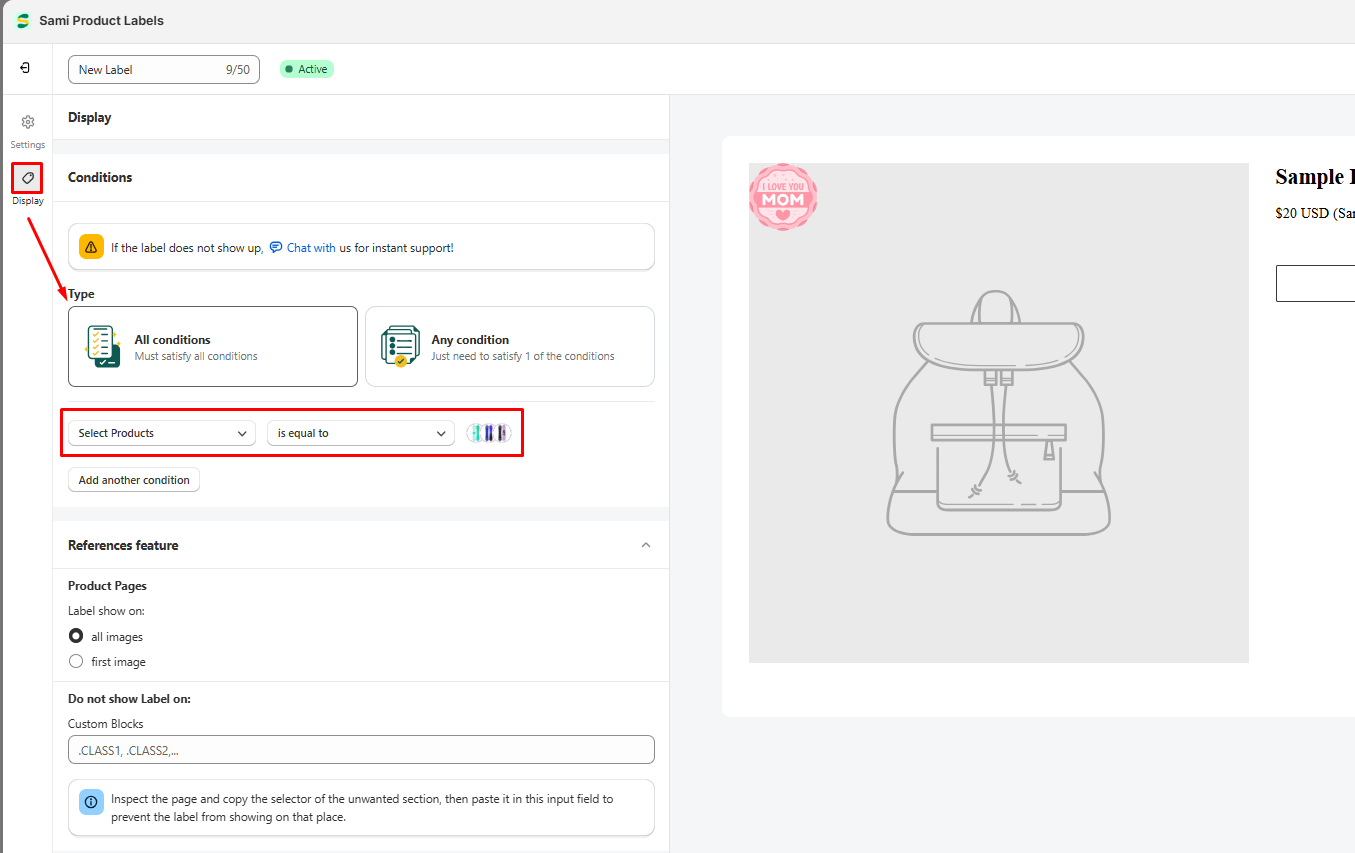
- From the app admin page, click Badges and Labels > open the badge or label you want to edit
- Click the Display icon on the left > Set up a condition to select products.
- If you set multiple conditions, consider selecting Any condition or All conditions
- Click Save to update the changes
- Go to the front store to check the result
For example, setting up a label to show on some specific products only:
Some examples
Apply badge/label to all products
- From the app admin page, click Badges and Labels > open the badge or label you want to edit
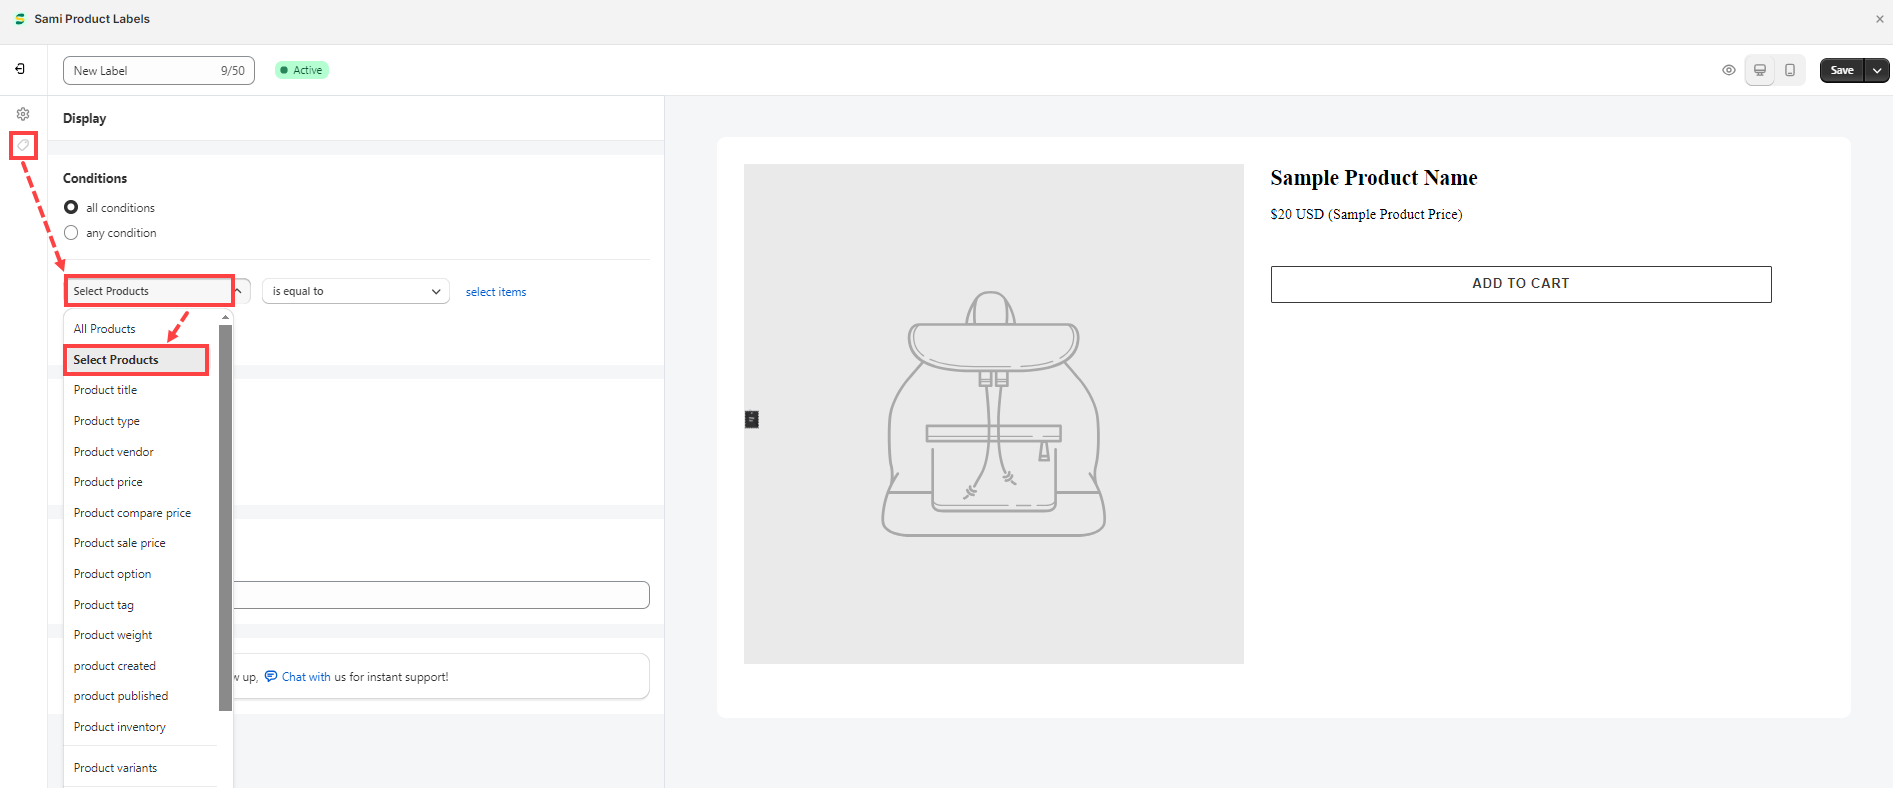
- Click the Display products
- In the dropdown, select All products
- Click Save to update the changes
- Go to the front store to check the result

Apply badge/label to selected products
- Open the app > click Badges and Labels > open the badge or label you want to edit
- Click Display products
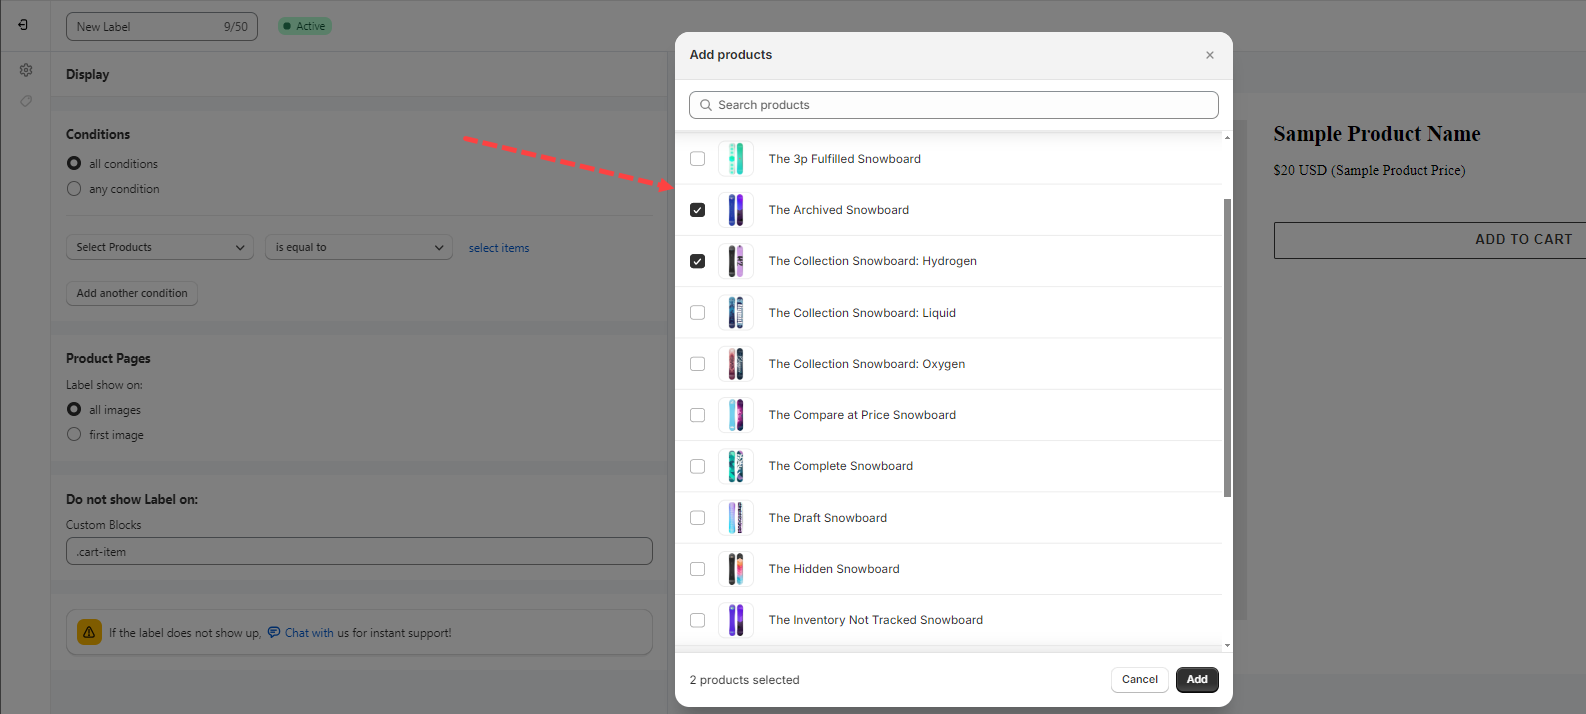
- In the condition dropdown, select Select Products – is equal to –
- Then click select Items> tick on the checkbox of the products you want > Save
- If you want to remove the selected products, untick the checkbox of the products or click on the (x) icon next to the product ID
- Click Save to update the changes
- Go to the front store to check the result
Please see the screenshot below for reference:

Apply badge/label to selected collections
- From the app admin page, click Badges and Labels > open the badge or label you want to edit
- Click Display products
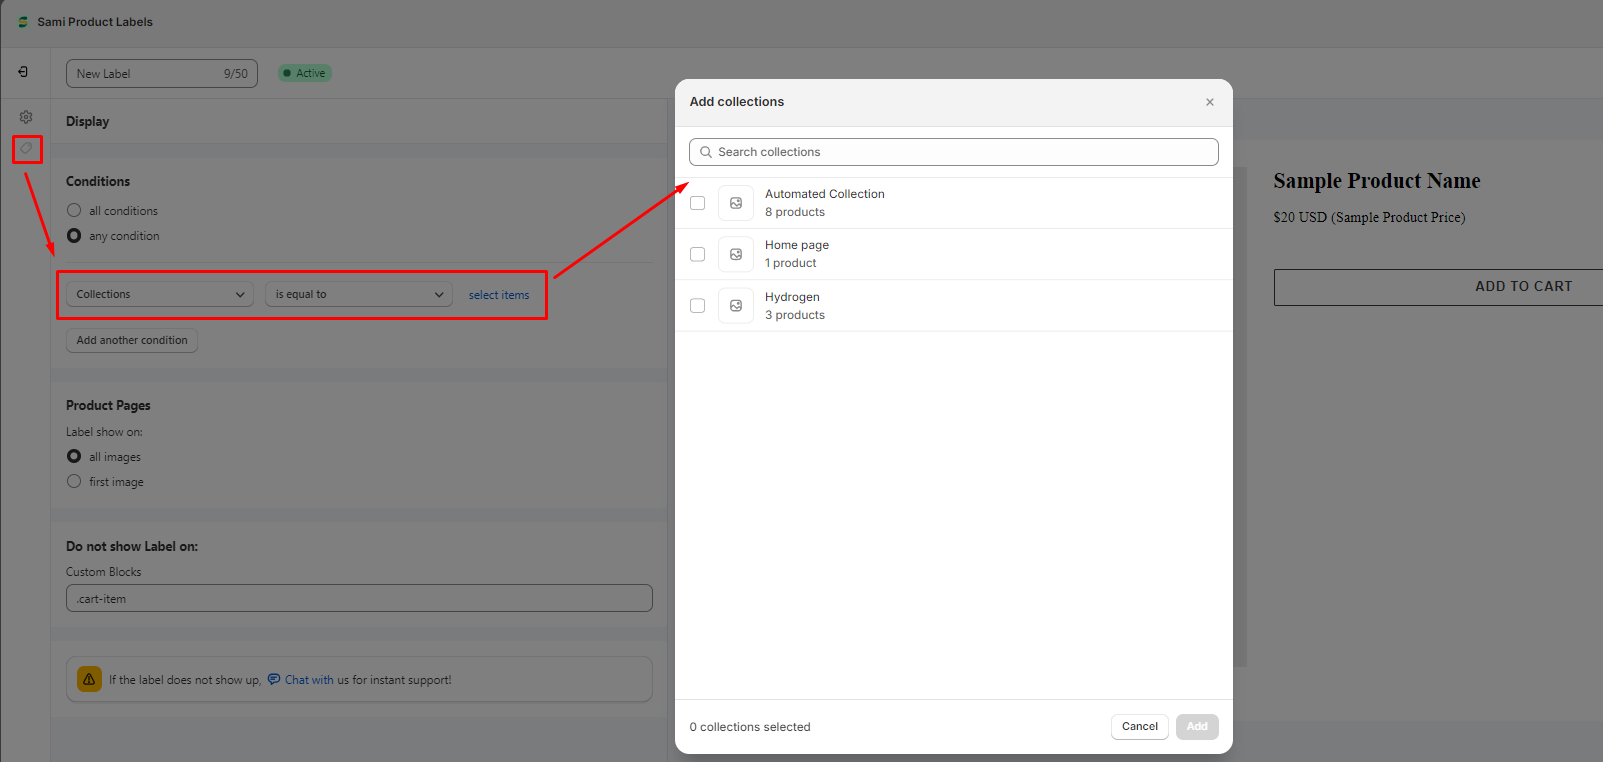
- In the dropdown, select Collections > is equal to
- Click Select Items> tick on the checkbox of the collection you want
- If want to remove the selected products, untick the checkbox of the products or click on the (x) icon next to the product ID
- Click Save to update the changes
- Go to the front store to check the result
Apply badge/label to products with a specific tag
The example case is that you want to display the label Big sale on the products with the tag “big sale“. Please follow the steps below to set it up.
- From the app admin page, click Badges and Labels > open the badge or label you want to edit
- Click Display products
- In the dropdown, select Product tag > is equal to > enter the text bigsale on the field after
- Click Save to update the changes
- Go to the front store to check the result
